

I killed my first string of pearls in about six weeks. I loved how it looked in the nursery — full, trailing, plump little beads cascading over the pot — and I brought it home, put it in a decorative pot with no drainage hole because it matched my shelf, and watered it on the same schedule as my other succulents. Within a month, the pearls had gone soft and translucent, and by week six the whole thing had collapsed into a mushy pile I had to throw out entirely.
That failure sent me down a rabbit hole of figuring out what I’d actually done wrong, and I’ve now kept a string of pearls alive and thriving for going on three years, currently trailing well past two feet from a hanging pot near my kitchen window. Here’s the real string of pearls care routine that’s worked for me, including the mistakes that got me there.
Why This Plant Is Less Forgiving Than It Looks
String of pearls (Senecio rowleyanus, sometimes still labeled Curio rowleyanus depending on where you buy it) stores water in those round, bead-like leaves, which makes it look like it should handle neglect the way a lot of succulents do. In my experience, that’s only half true. It’s genuinely drought-tolerant once established, but it’s much less forgiving of overwatering than something like an echeveria or a jade plant, mostly because those thin, delicate stems seem to have very little tolerance for sitting in damp soil before rot sets in. My mistake wasn’t watering too often on paper — it was the combination of no drainage hole and a watering schedule meant for a different kind of succulent.
Watering: The Part I Had Completely Backward
After I lost that first plant, I started my second string of pearls with the “soak and dry” method — watering thoroughly until it runs out the drainage hole, then not touching it again until the soil is completely dry, not just dry on the surface. I check by sticking a finger about an inch into the soil, and if there’s any coolness or dampness at all, I wait.
In my apartment, this ends up being roughly every 2-3 weeks in summer and closer to once a month in winter, though I’ve learned this varies a lot depending on pot size and how much light the plant is getting. The pearls themselves are actually a decent indicator — when they start looking slightly less plump or a bit softer than usual, that’s my plant’s way of telling me it’s ready for water, rather than following a fixed calendar.
Light: More Important Than I Initially Realized
My second attempt also started in a spot with fairly low light, and while it survived, the growth was noticeably leggy — long stretches of bare stem between sparse, smaller pearls, nothing like the tightly packed strands I’d seen at the nursery. Moving it to a spot with bright, indirect light near an east-facing window made a visible difference within about a month, with new growth coming in noticeably fuller and more tightly beaded.
I’ve also learned the hard way that direct, intense afternoon sun can scorch the pearls, leaving brown, sunburned patches on the side facing the window. My current plant gets bright morning light directly and is shielded from the harshest afternoon sun by a sheer curtain, which has been the best balance I’ve found.
The Soil and Pot Mistake That Started This Whole Thing
The no-drainage-hole decorative pot was the single biggest factor in losing my first plant, and I can’t stress this enough: it doesn’t matter how good your watering habits are if the excess water has nowhere to go. Every pot I use now has a drainage hole, no exceptions, even if it means putting a plain nursery pot inside a decorative cachepot rather than potting directly into something pretty but impractical.
For soil, I use a succulent and cactus mix with extra perlite added in — roughly one part perlite to every three parts of the bagged mix — which noticeably speeds up how fast the soil dries between waterings compared to using the bagged mix straight out of the bag. If a mix stays visibly damp for more than a few days after a thorough watering, I’ve found that’s a sign it needs more drainage material added.
Fertilizing: Less Is More
I under-fertilized for the first year, honestly out of nervousness after killing my first plant, and I don’t think it hurt the plant much — string of pearls just isn’t a heavy feeder. Now I fertilize with a balanced liquid succulent fertilizer diluted to about half strength, roughly once a month during spring and summer, and I stop completely from late fall through winter when growth naturally slows down.
The one time I over-fertilized, using a stronger dilution than recommended because I was impatient for faster growth, I noticed the newest pearls came in slightly smaller and the tips of a few strands looked mildly burned. Backing off to the diluted, monthly schedule fixed it within a few weeks.
Propagating: The Easiest Part of the Whole Process
If there’s one part of string of pearls care that’s genuinely beginner-friendly, it’s propagation. I’ve had the most success just laying a healthy cut stem section directly on top of moist succulent soil, rather than burying it, and letting it sit in bright, indirect light. Within about 3-4 weeks I usually see small roots forming from the stem where it contacts the soil, and new growth typically follows within another few weeks after that.
My one propagation failure came from trying this during winter, when growth had already slowed down — the cutting just sat there for nearly two months without any visible progress before I gave up. Since then I only propagate in spring or summer, which has worked reliably every time.
Pruning: Something I Avoided Longer Than I Should Have
I was hesitant to prune my string of pearls for a long time, worried about damaging it, which in hindsight left it looking sparser at the base than it needed to be as the older growth thinned out. Trimming back leggy or sparse stems during the growing season, and using those trimmings to propagate new plants, has actually made the whole plant look fuller over time, since it encourages new growth from the base rather than just letting existing strands get longer and thinner.
Repotting: Signs I Almost Missed
My current plant needed repotting for the first time when I noticed roots poking out of the drainage hole and the soil drying out unusually fast, sometimes within just a few days of a thorough watering. I moved it up one pot size, being as gentle as possible with the trailing stems since they tangle and snap fairly easily if handled roughly, and backed off watering for about a week afterward to let it settle before resuming the normal soak-and-dry routine.
Problems I’ve Actually Run Into
Mushy, yellowing pearls — this has only ever meant overwatering in my experience, and the fix has always been the same: stop watering immediately, check the roots for any black or mushy sections and trim them away, then repot into fresh, well-draining soil.
Shriveled, deflated-looking pearls — the opposite problem, usually meaning it’s been too long since the last watering or the humidity is unusually low. A thorough soak has always brought the pearls back to looking plump within a day or two.
Brown spots on pearls facing the window — sunburn, in my experience, from moving the plant into more direct light too quickly. I’ve learned to make any light changes gradually rather than moving a plant straight from low light into full sun.
Fine webbing or small cottony clusters on the stems — spider mites and mealybugs have both shown up on my plant at different times, usually when it’s been a bit stressed from inconsistent watering. Isolating the plant immediately and treating with rubbing alcohol on a cotton swab for mealybugs, or increasing humidity and using diluted neem oil for spider mites, has cleared both up within a few weeks each time.
What I’d Tell Myself Before Buying My First One
If I could go back to that first purchase, I’d tell myself two things: get a pot with a drainage hole before anything else, and let the soil dry out completely before watering again, even if that feels uncomfortably long compared to other houseplants. Almost everything else about string of pearls care follows from getting those two things right first.
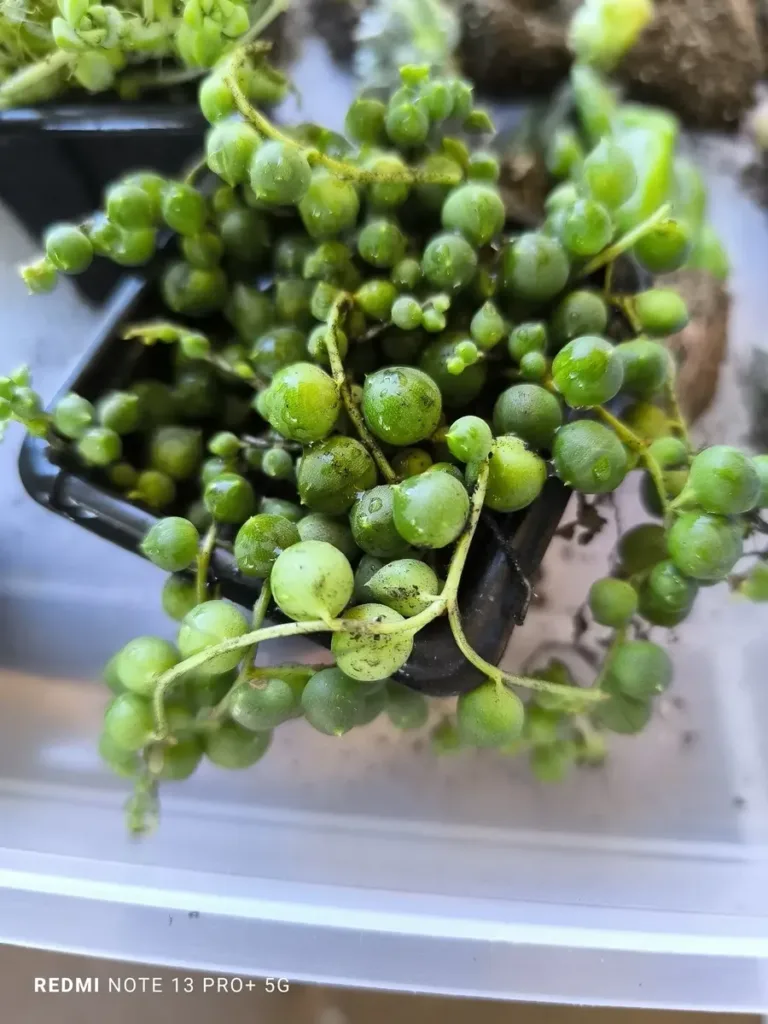
Frequently Asked Questions
How often should I water my string of pearls? In my experience, roughly every 2-3 weeks in the growing season and closer to monthly in winter, though the real signal is checking that the soil has dried out completely, not following a fixed schedule.
Why are my string of pearls beads shriveling? Based on what’s happened with my own plant, this has always meant it’s gone too long without water or the humidity has dropped. A thorough soak usually restores plump pearls within a day or two.
Can string of pearls grow in low light? It will survive, but in my experience it gets noticeably leggy, with sparse, stretched-out growth. Bright, indirect light has consistently produced fuller, more tightly beaded strands for me.
Is string of pearls toxic to pets? It’s generally considered mildly toxic if ingested, so I keep mine well out of reach of my cat, hanging rather than on an accessible shelf.

Gardening Writer & Plant Enthusiast
Sarah Mitchell is a passionate gardening writer dedicated to helping people bring more nature into their homes. She loves exploring indoor plants, flowers, and sustainable gardening practices, sharing simple and practical tips that make plant care easier for everyone.